After 12 years of nursing aging PC’s to serve my home hobby of self-hosting experiments to racing simulator rigs, I finally pulled the trigger on a new home PC that can do it all… I hope!, I chose the following hardware spec:
- Corsair iCue 5000X Mid Tower Case
- Gigabyte Gaming AX AM5(AMD) ATX
- AMD Ryzen 7950X3d 16/32 CPU
- Cooler Master Liquid Cooling
- 128GB RAM
- NVIDIA RTX 3090 GPU
- NVME M2 Storage x2
- 4 x SATA-3 SSD’s
- A splash of RGB
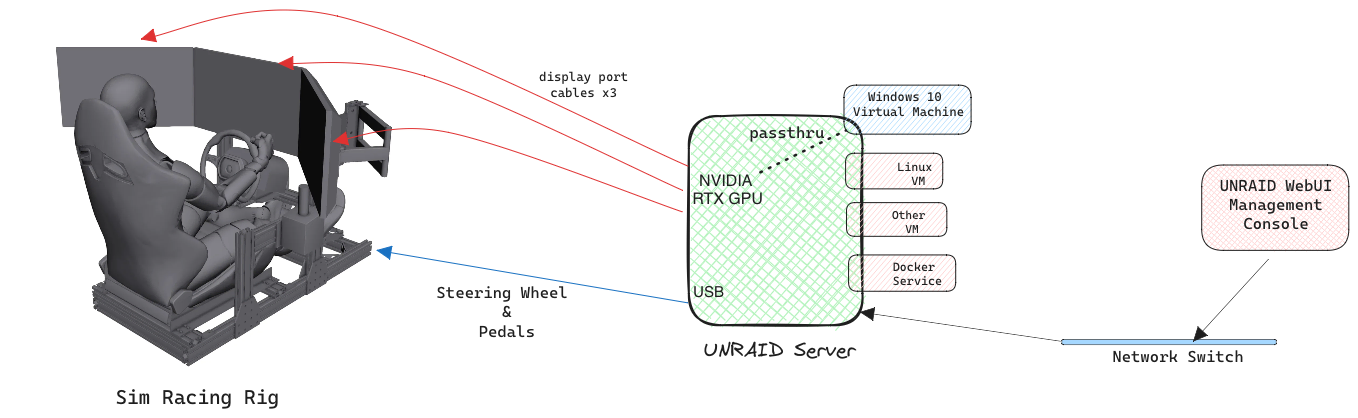
Due to my multi-use case requirement of needing to run applications on Docker, VM’s(Linux and Windows), Sim-Racing game that needs a GPU pass-thru for a triple monitor setup.. I didn’t want to install everything on 1 Operating System.. and I wanted it to be fairly low maintenace and modular, so I can actually use the server. UnRAID ticked all those boxes and more. UnRAID simply boots your PC of a USB stick, and provides you with an intuitive Web UI to configure and deploy Storage Arrays, Docker Container applications and Virtual Machines.
This post will focus on how to deploy a Windows 10 VM on UnRAID with NVIDIA GPU Passthru, so assuming that you have booted up your PC with UnRAID and have an SMB share available for your Windows 10 VM, we will start from there.
Windows 10 Gaming VM with NVIDIA GPU Pass-thru
Deploying and Windows 10 Gaming VM for my sim racing rig was the main driver to be honest, with GPU passthru for the video/audio to a triple monitor setup for my sim racing rig. UnRAID enabled me to do this whilst still being able to utilise the UnRAID Server resources for other VM’s(Linux, Windows), Docker Services/Apps and centralised data storage.
Configuration Schematic:
The following is a block-level representation of what I setup that is functional and working beyond my expectations.
Step 1: Prepare UnRAID to build your Windows 10 Gaming VM with NVIDIA GPU Passthru
Download the following ISO’s for the Windows 10 OS and IO Drivers:
- Latest UnRAID Stable Version: 6.12.10 [2024-04-03]
- Windows 10(64bit) : Win10_22H2_English_x64v1.iso
- Windows Virtual IO Driver: virtio-win-0.1.248-1.iso (Downloadable through the UnRAID Create VM WebUI)
- Download VBIOS for your GPU model, in my case its for the Gigabyte NVIDIA RTX 3090. Find your GPU cards VBIOS ROM from here: https://www.techpowerup.com/vgabios/
- Sim Racing Game : Automobilista 2(AMS2) via Steam.
Step 2: UnRAID Server Config
- To help keep the Windows 10 performant, have some NVME or SSD Storage Array device available for the Windows 10 Operating System, start with about 50GB. which gives you some extra base OS storage slop for downloads and apps.
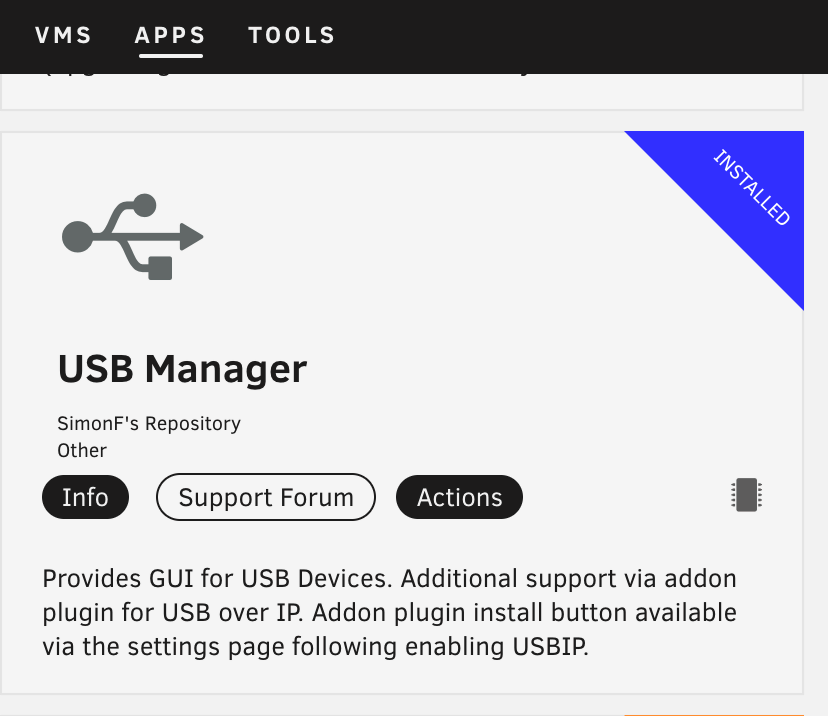
- Install UnRAID Plugin “USB Manager” from the APPS UnRAID Webui Menu bar. This is helpful in mapping the correct USB Devices that you physically attach to the UnRAID server
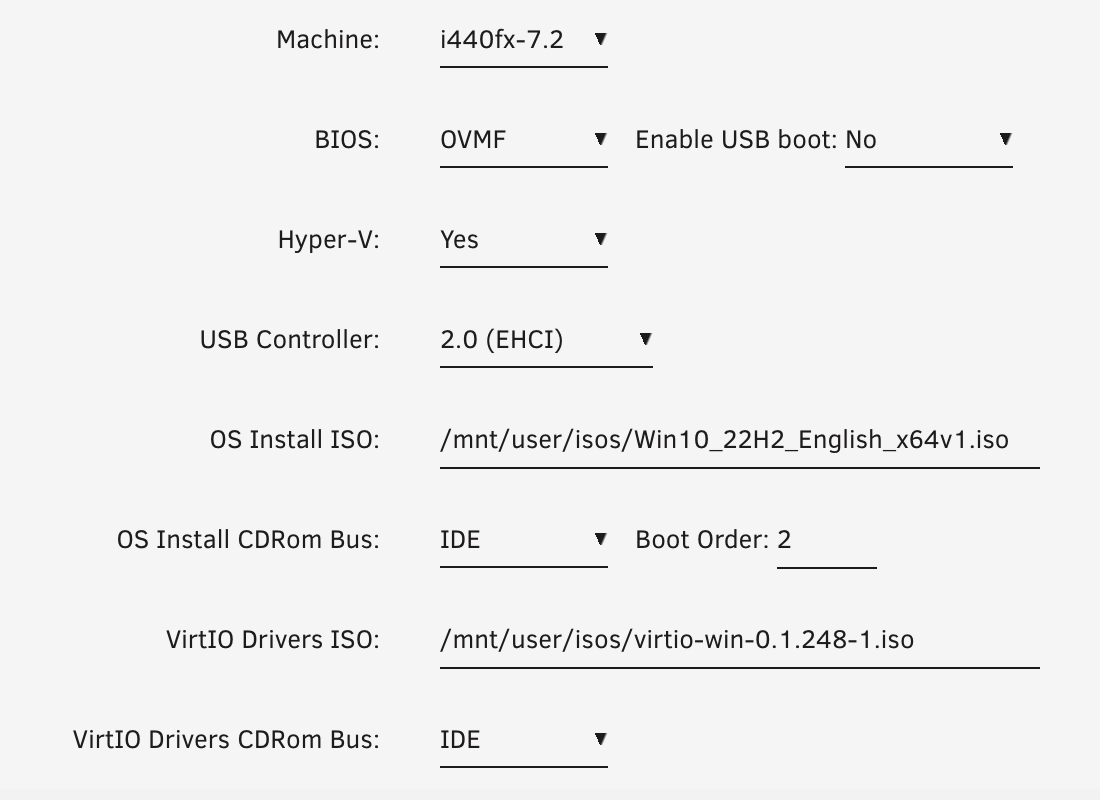
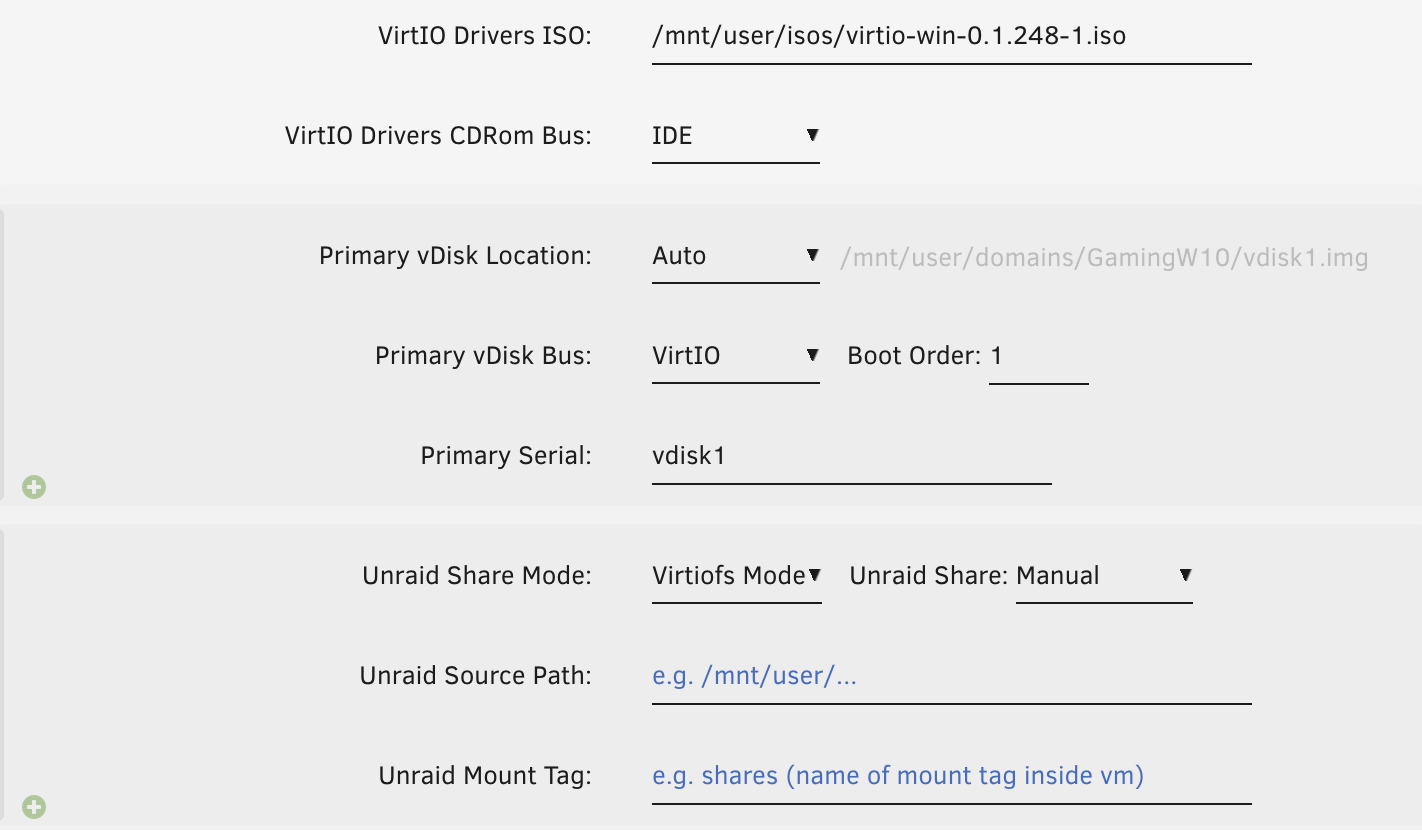
Step 3: Deploy Windows 10 VM with the following options
- CPU Mode: Host Passthrough
- Allocate 2-4 Logical CPU’s to start with (you can always add more)
- Start with an Initial and Max Memory of 8GB(8192MB)
- For Default UnRAID install, select ‘br0’ as network source.
- Screenshots of VM config options to get started:
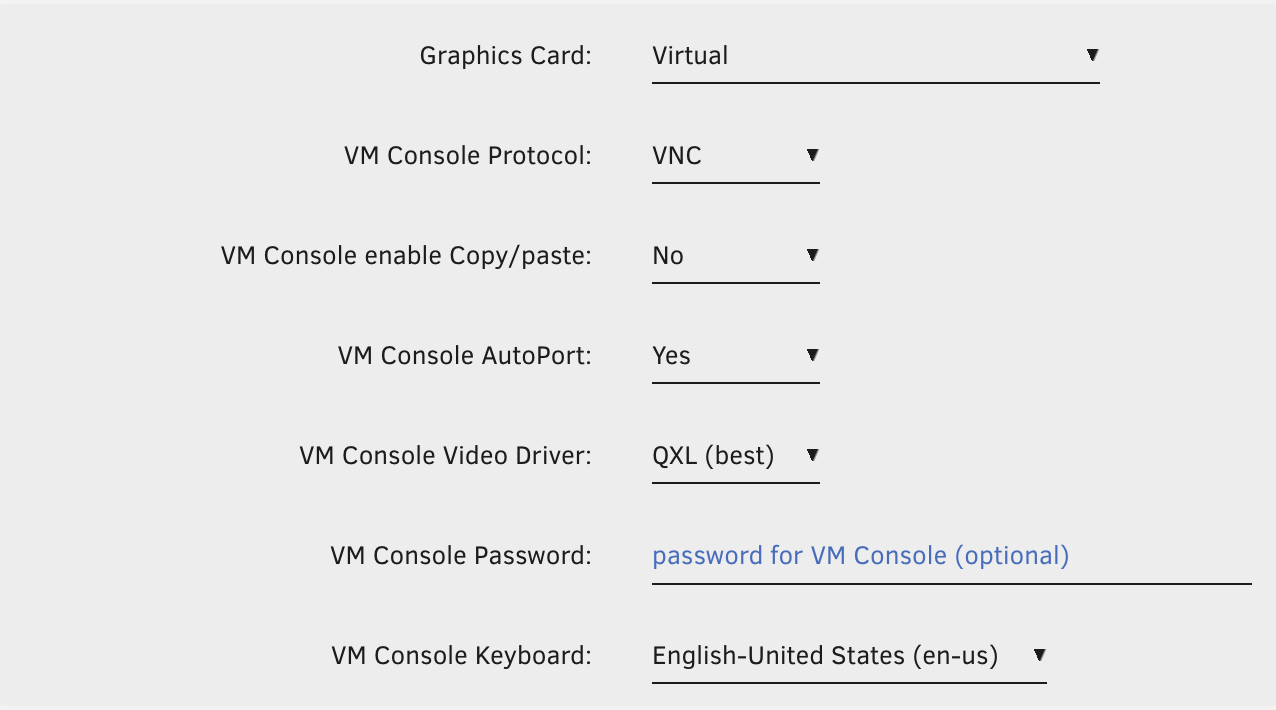
- Deploy Windows 10 VM. Take note that is will deploy a basic Windows VM without GPU pass-through, we first deploy the VM with a VNC display as we don’t have all the drivers installed yet. Once the VM is deployed you can complete the initial Windows install through the UnRAID WebUI VM VNC console.
- During the the Windows install you will need add the VirtIO drivers for Disk and Network adaptor by selecting “Search Local Computer” and you will find that the VirtIO ISO has been mapped to a Drive in Windows (it was E: on mine), choose E:\ to search local computer for drivers, and it will find the right drivers for you; both Disk and Network.
- To update drivers for network adaptor, update drivers from the Windows Device Manager tool. Type in Device Manager in the window search next to the start button.
Step 4: Add GPU Configuration and Passthrough
Now that we have the Windows up and running with Internet connectivity we can now proceed to add the NVIDIA GPU and Driver install
- Shutdown the Windows VM
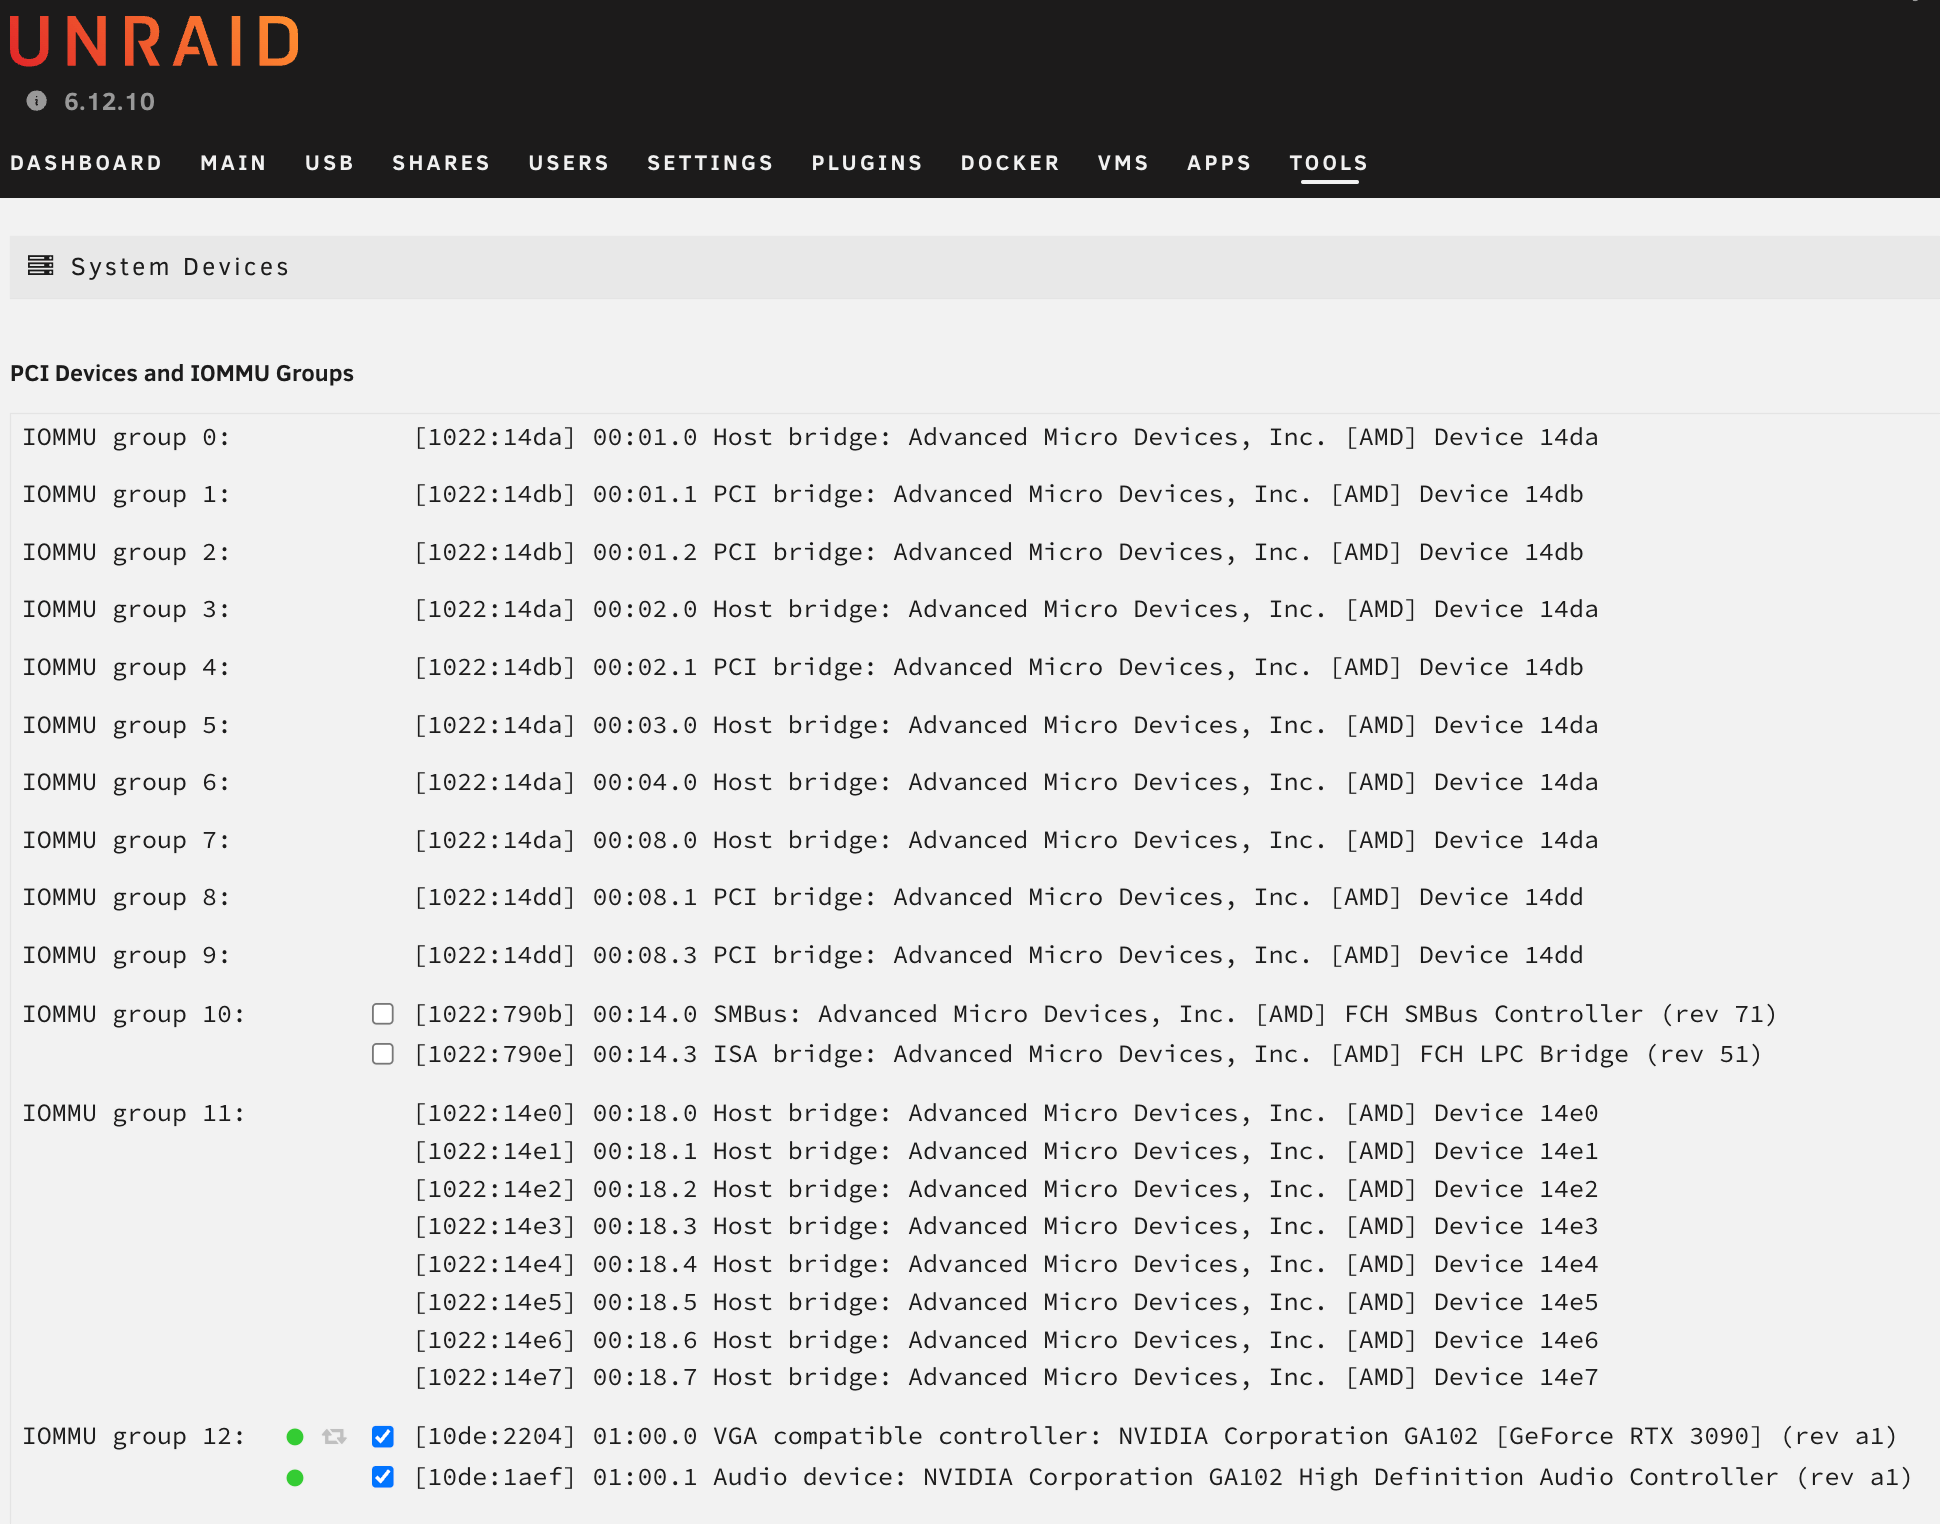
- Map PCI Device with NVIDIA GPU to passthrough to the VM by Cicking UnRAID WebUI TOOLS-System Devices
- Tick the IOMMU Group that have the NVIDIA Descriptors on it
- Apply the change, which will require a reboot of the UNRAID Server for changes to take effect
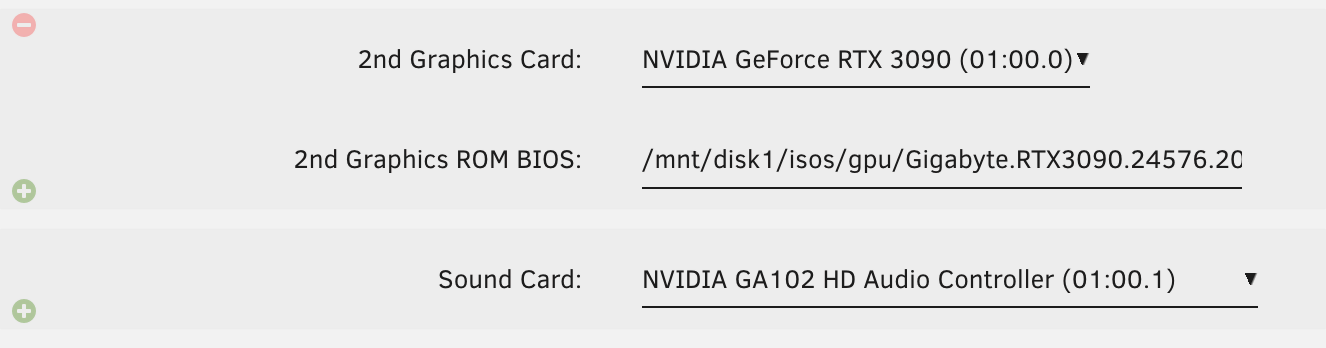
- Ensuring that the Windows VM is still Shutdown, through the UnRAID WebUI VM editor, Edit the Windows VM configuration to add a second Graphics card by clicking on the small green plus sign at the bottom left of the VNC graphics section. You will need to configure the 2nd Graphics ROM BIOS to the location you uploaded the GPU VBIOS rom to.
- Start the VM again and connect to VM through the UnRAID WebUI VNC console
- Download and install the NVIDIA drivers for your GPU
- Install Steam and Automobilista 2
- You now have full GPU passthrough into your Windows 10 VM!
Step 5: Passthrough the USB Steering wheel and Pedals
You can now passthrough the USB Devices you want to use in the Windows VM.
- Connect USB devices to UnRAID Server
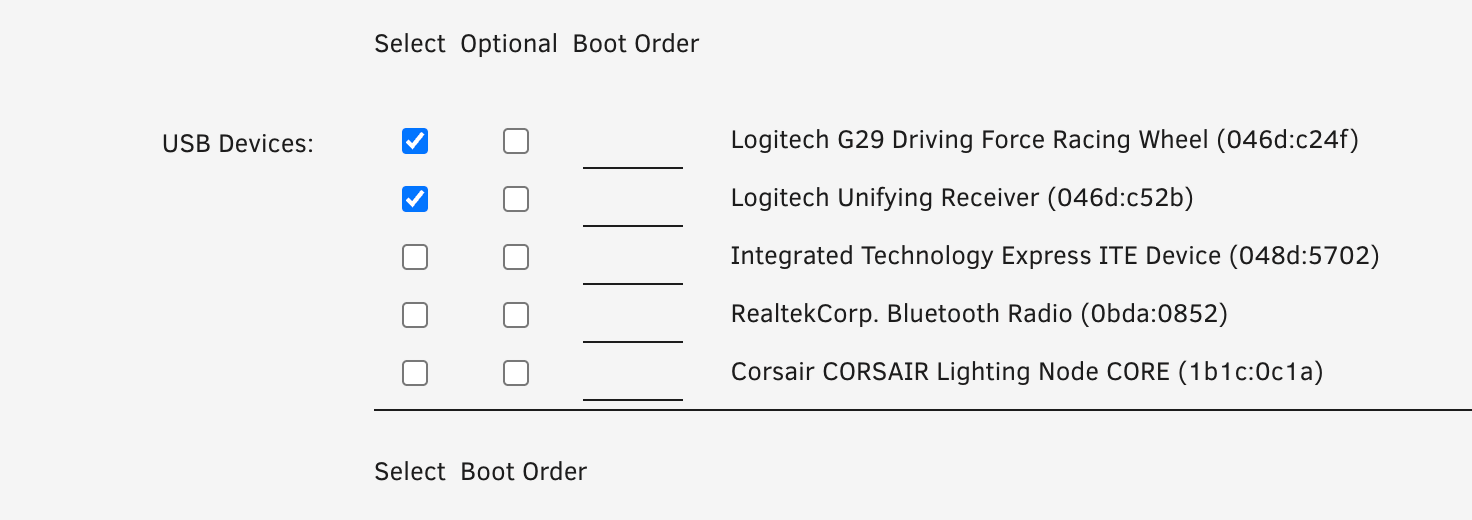
- Edit the Windows VM through the UnRAID WebUI and from the USB Devices list at the bottom, select the ones you want to passthrough to the Windows VM. I have used the Logitech G29 for this example:
- Boot Up the VM again
- You can cross check USB Mapping with the UnRAID WebUI USB Manager plugin installed earlier:

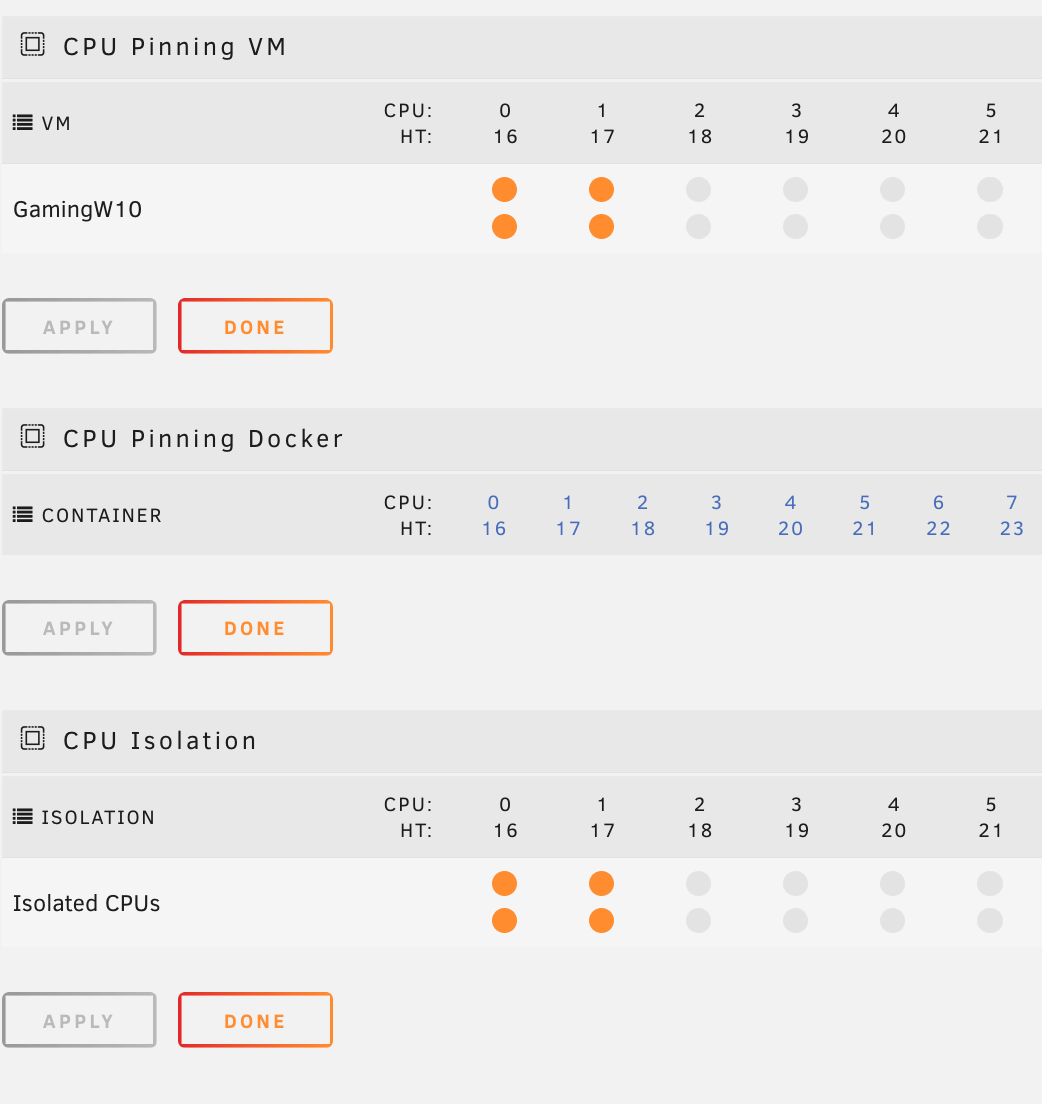
Step 6: Pin the CPU’s assigned to the Windows VM
To keep your Windows 10 VM performant on UnRAID and not get disturbed by noisy neighbour UnRAID processes, from the UnRAID WebUI, Pin and Isolate the CPU cores allocated to the Windows VM under “SETTINGS - System Settings - CPU Pinning” as per following diagram;
“Its Lights out and Away we go!” -David Croft(F1 Commentator)
We now have a Single Physical Server with a multi-purpose use case for most of your home storage, application, gaming, tooling needs with a Sim Racing Rig attached to it.
I also found the following Post helpful in getting my setup working: Unraid GPU Windows VM